Here’s the question that gets asked in EV forums constantly and answered inconsistently.
“Can I install my own home EV charger?”
The replies range from “absolutely, I did mine in an afternoon with basic tools” to “never, it’s 240V and you’ll kill yourself” — with very little in between that’s actually useful. Both extremes are wrong and both are unhelpful.
The honest answer is: it depends on what you’re installing, where you’re installing it, and what electrical work is already done.
DIY EV charger installation 2026 US Europe is more accessible than most people assume — but it’s also more nuanced than the YouTube videos that show someone plugging a NEMA 14-50 charger into a pre-existing outlet in fifteen minutes. There are genuine DIY scenarios that require nothing more than screwdriver competence and the ability to follow instructions. There are scenarios that require a licensed electrician regardless of your confidence level. And there are scenarios in the middle that depend on your jurisdiction’s electrical regulations and your honest assessment of your own abilities.
This guide covers all three — with specific charger recommendations for each, honest safety guidance that most DIY EV guides skip, and a clear statement of when DIY is appropriate versus when it genuinely isn’t.
The Critical Legal and Safety Context — Read This Before Everything Else
This section is not the usual liability disclaimer that gets ignored. It contains information that materially affects your decision and your safety.
What DIY EV Charger Installation Actually Means
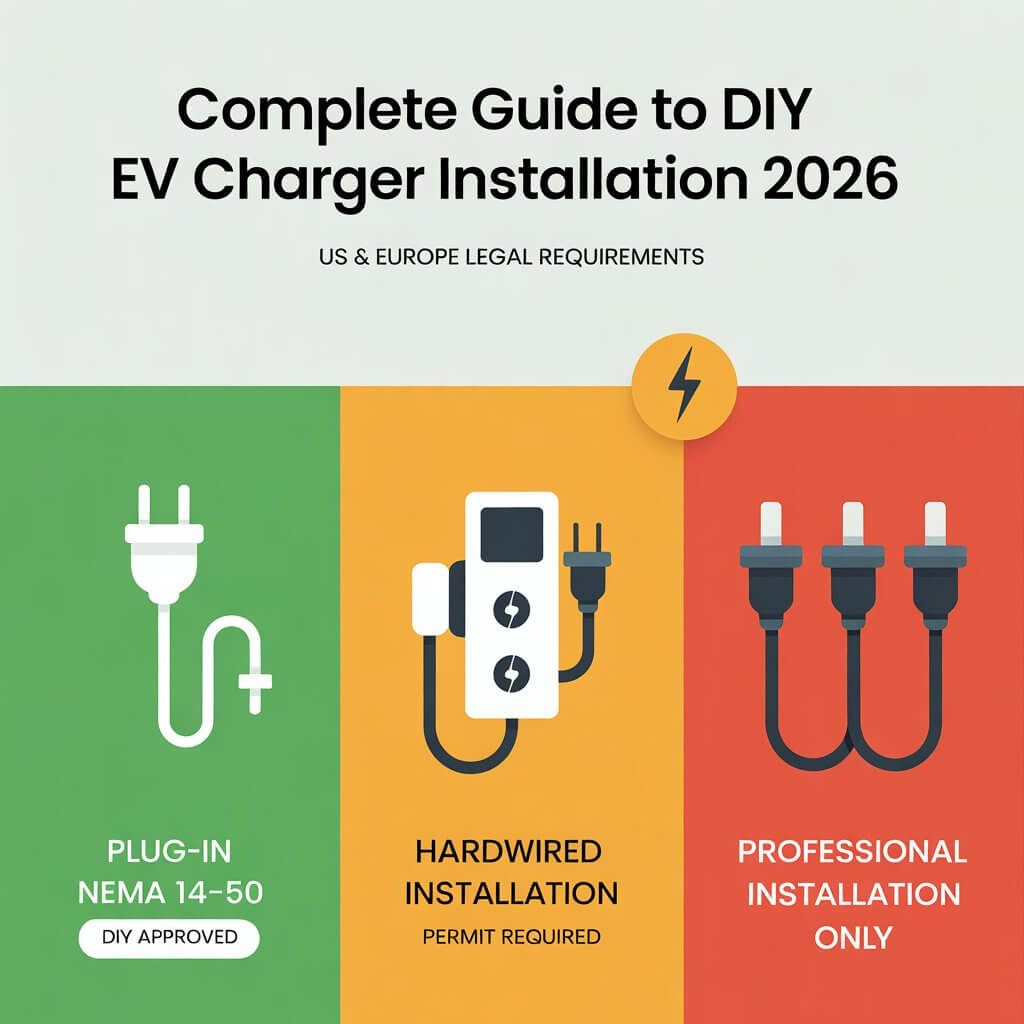
“DIY installation” covers a spectrum of electrical work with very different risk and legal profiles:
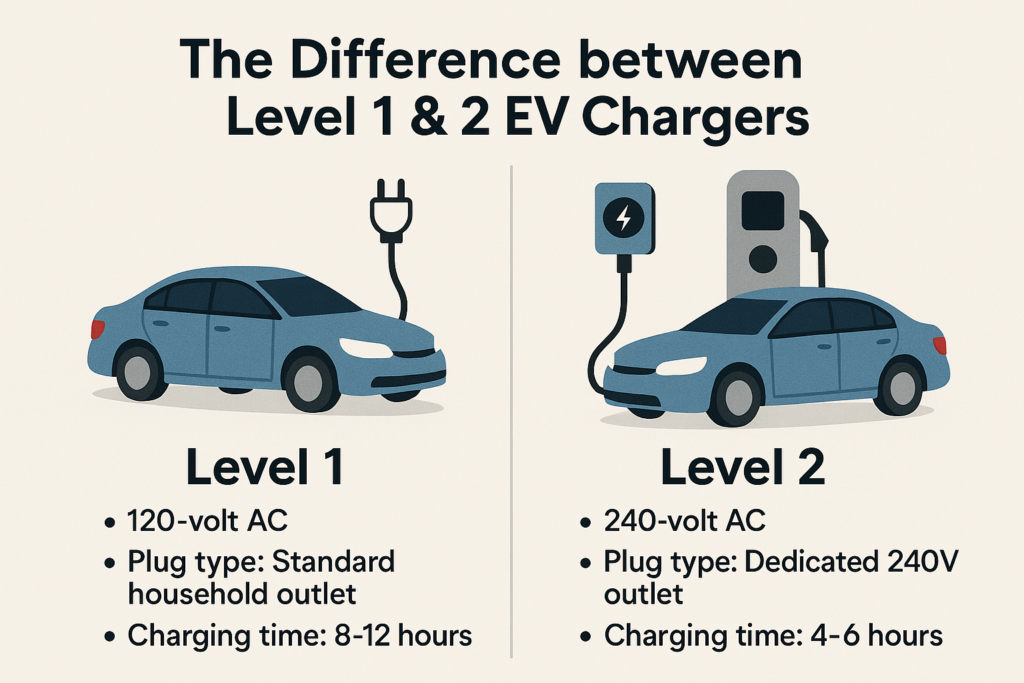
Scenario A — Plug-in installation (NEMA 14-50 in US, CEE socket in Europe): Plugging a portable EVSE into a pre-existing, correctly wired 240V outlet. No new wiring. No panel work. No different in principle from plugging a large appliance into an outlet. This is genuine DIY — no electrician required, minimal risk if the outlet was correctly installed.
Scenario B — Mounting a hardwired charger on a pre-existing dedicated circuit: A hardwired charger where the dedicated circuit already exists (from a previous installation or a purpose-installed outlet) and you’re mounting the charger unit and making the final connections. This requires comfort with 240V wiring and varies in legality by jurisdiction — some US states require a licensed electrician for any 240V connection, regardless of the work’s simplicity.
Scenario C — Installing a new dedicated circuit from the panel: Running new 240V wiring from your electrical panel to the charger location. This is the work most people mean when they say “installing an EV charger” and it’s where the risk and legal requirements are most significant. Most jurisdictions require a licensed electrician and permit for this work.
Scenario D — Three-phase circuit work (European): Three-phase wiring work in Europe is universally considered work for a qualified electrician. The complexity, three-phase-specific safety considerations, and regulatory requirements make this category categorically not DIY territory in any European market.
This guide covers Scenarios A and B as genuine DIY territory and Scenario C as conditional DIY — depending on jurisdiction, your qualifications, and your honest assessment of ability.
US Legal Requirements by Jurisdiction
US electrical code requirements for EV charger installation vary by state and sometimes by municipality:
National Electrical Code (NEC): The NEC (adopted in most US states) requires that 240V circuit work be performed by a licensed electrician in most jurisdictions. However, the NEC allows homeowners to perform electrical work on their own property in many states — with a permit and inspection.
States where homeowner 240V work is generally permitted with a permit: Most states allow homeowners to install electrical circuits in their own primary residence with a permit and subsequent inspection. This includes the circuit work for an EV charger.
States with stricter requirements: California, Massachusetts, and some other states have additional requirements — licensed contractor for all permitted electrical work in some jurisdictions, or specific EV charger installation permits.
The permit requirement: Even where DIY electrical work is legally permitted, a permit is required for any new 240V circuit. The permit process involves an inspection by a local building official after the work is complete. Skipping the permit creates insurance liability exposure — if a fire occurs related to the electrical installation, your homeowner’s insurance may deny the claim if unpermitted work is involved.
The practical implication: Plug-in NEMA 14-50 installation into a pre-existing outlet — no permit required, genuine DIY. New 240V circuit work — permit required, DIY legal in most states but requires inspection.
UK Legal Requirements
In the UK, EV charger installation is defined as “notifiable electrical work” under Part P of the Building Regulations. This means:
- All EV charger installations in the UK must be carried out by a registered electrician (or notified to the local authority building control department)
- The installation must be certified — the electrician provides an Electrical Installation Certificate
- OZEV grant eligibility requires an OZEV-registered installer — any DIY installation disqualifies you from the grant
The practical implication for UK owners: There is effectively no legal DIY path for EV charger installation in the UK beyond plugging a portable EVSE into a standard 13A socket (which is too slow to be considered proper home charging). The UK’s regulatory framework makes licensed installation mandatory.
European Legal Requirements
European electrical regulations for residential work vary by country:
Germany: Low-voltage electrical work in residential properties requires a licensed electrician (Elektrofachkraft). DIY 240V or three-phase work is not legally permitted.
France: Similar to Germany — residential electrical work requires a qualified electrician. DIY electrical work is technically possible for homeowners but is strongly discouraged and not covered by home insurance in most cases.
Netherlands, Belgium, Scandinavia: All require licensed electrician for new circuit installation.
The practical implication for European owners: The honest reality is that genuine DIY EV charger installation in Europe (beyond plug-in portable EVSEs) is not a legally compliant path in most European markets. This guide covers European installation primarily in the context of understanding what the process involves and how to choose the right hardware — not as a guide to unsupervised three-phase electrical work.
The Genuine DIY Scenarios — Where You Can Do This Yourself
With that legal context established, here are the scenarios where genuine DIY EV charger installation is appropriate, legal, and safe:
Scenario 1: NEMA 14-50 Plug-In Installation (US) — The True DIY Option
This is the most accessible DIY EV charging scenario and it’s genuinely straightforward for anyone with basic tool competence.
What it requires:
- A pre-existing NEMA 14-50 outlet (the same socket used by electric ranges and dryers) at your parking location
- A portable Level 2 EVSE with a NEMA 14-50 plug
- No additional wiring, no panel work, no permit
What’s involved: Literally plugging the charger into the outlet. The EVSE hangs from a hook or bracket on the wall (included with most portable EVSEs). The J1772 or NACS end plugs into your car. Done.
The catch: You need a pre-existing NEMA 14-50 outlet at your parking location. If one doesn’t exist, you need an electrician to install one — which is Scenario C territory (new circuit work). But if one already exists — from a previous EV installation, a workshop outlet, or a purpose-installed outlet by a previous owner — plug-in EVSE installation is genuine zero-skill DIY.
Best portable EVSEs for NEMA 14-50 plug-in:
- Lectron 240V Level 2 EVSE ($189-$229): 40A, J1772 or NACS versions, 20-foot cable, genuine no-frills simplicity
- Grizzl-E Duo ($299-$349): 40A, IP67, 24-foot cable, 3-year warranty — the most robust portable EVSE option
- Tesla Mobile Connector with NEMA 14-50 adapter: if you drive a Tesla, the included Mobile Connector already handles this with the included adapter
Scenario 2: Hardwired Charger on Pre-Existing Circuit (US, With Permit)
This is the intermediate DIY scenario — mounting a hardwired charger unit and making 240V connections on a circuit that already has a dedicated breaker.
What it requires:
- A dedicated circuit breaker in your panel that isn’t currently connected to anything (sometimes left by a previous installation)
- 6 AWG or 8 AWG copper wire from the panel to the charger location (must already be run or you need an electrician to run it)
- A permit in most US jurisdictions
- Comfort working with 240V wiring — stripping wire, connecting to terminal blocks, safely managing live circuits
What’s involved: Mounting the charger unit on the wall, connecting the incoming wires to the charger’s terminal block according to the manufacturer’s wiring diagram, and applying power. The actual charger connection is typically three wires — Line 1, Line 2, and Ground — connected to clearly marked terminals.
Safety requirements that are non-negotiable:
- Always turn off the circuit breaker before making any connections
- Verify the circuit is dead with a voltage tester before touching any wires
- Follow the specific charger manufacturer’s wiring diagram exactly
- Have the installation inspected (this is required for the permit and is an important safety check)
Best hardwired chargers for DIY-friendly installation:
The Grizzl-E Classic and Grizzl-E Smart have the most installation-friendly terminal block design of any popular US hardwired charger — clearly marked terminals, generous wire entry space, and a wiring diagram that even a novice can follow. The metal enclosure is also easier to drill mounting holes in than plastic alternatives.
The ChargePoint Home Flex’s adjustable amperage DIP switch is straightforward to set during installation. Clear installation manual. Good support resources.
The Emporia Pro’s installation manual is among the clearest in the segment — step-by-step with photos. The NEMA 14-50 plug option eliminates the hardwired connection entirely for plug-in installation.
Scenario 3: CEE Socket Plug-In Installation (Europe) — Limited DIY
The European equivalent of the NEMA 14-50 plug-in scenario: a portable Type 2 EVSE that plugs into a CEE 16A (blue) or CEE 32A (red) industrial socket.
What it requires:
- A pre-existing CEE socket at your parking location
- A compatible portable Type 2 EVSE
The reality: CEE sockets are common at campsites, rural properties with agricultural connections, and some older European homes with workshop power. If you have one, plug-in EVSE installation is as simple as the US NEMA scenario. If you don’t, installing a CEE socket requires a licensed electrician in all European markets.
Best portable EVSEs for European CEE plug-in:
- Juice Booster 2 (€499-€699): 22 kW at CEE 32A three-phase, multi-adapter system, IP67, the most versatile European portable EVSE
- Keba KeContact P30 Portable (€299-€449): 7.4 kW on CEE 16A single-phase, solid Keba reliability
The Easiest Hardwired EV Chargers to Install — US 240V
For US owners who have a dedicated circuit available and want to mount a hardwired charger themselves (with permit), these are the models with the most DIY-friendly installation experience:
Grizzl-E Classic — Easiest Overall US DIY Installation
Price: $229 Why it’s DIY-friendly:
- Three clearly marked terminal connections (L1, L2, Ground) — no complex wiring beyond the basics
- Metal enclosure with pre-drilled mounting holes on standard stud spacing
- Comprehensive installation manual with clear diagrams
- Conduit entry points at multiple locations for flexible cable routing
- No setup required after installation — no app, no WiFi, no configuration
- 3-year warranty doesn’t require professional installation certification
Installation time for competent DIYer: 45-90 minutes including mounting, wiring, and circuit verification
What makes it easier than competitors: The absence of smart features actually simplifies installation — no WiFi setup, no app configuration, no communication modules to connect. Mount it, wire it, turn it on. A dumb charger is inherently simpler to install than a smart one.
The one complexity: The conduit or cable management from your panel to the charger location. This is the work that typically requires an electrician — the charger unit installation itself is genuinely simple.
Emporia Pro — Easiest Smart Charger DIY Installation
Price: $399 Why it’s DIY-friendly:
- Available in NEMA 14-50 plug version — eliminating hardwired installation entirely for plug-in scenarios
- Clear terminal block with comprehensive installation manual
- WiFi setup through the Emporia app is straightforward — QR code pairing, clear prompts
- Adjustable amperage through the app rather than DIP switches — simpler for DIY configuration
- Emporia’s customer support is responsive for installation questions
Installation time for competent DIYer (NEMA 14-50 version): 15 minutes — plug in, mount the cable management hook, connect to WiFi
Installation time for competent DIYer (hardwired version): 60-90 minutes
What makes it easier than competitors: The NEMA 14-50 plug option is the simplest possible installation path for a smart charger with solar integration and load management. No hardwired connection, no permit required (for plug-in installation into a pre-existing outlet), full smart feature access.
ChargePoint Home Flex — Best DIY Option for Flexible Amperage Setup
Price: $699 Why it’s DIY-friendly:
- Clearly documented DIP switch amperage adjustment — set your amperage during installation to match circuit capacity
- NEMA 14-50 plug version available — plug-in installation option
- ChargePoint’s installation guide is one of the most comprehensive in the segment
- Good online installation support resources including video guides
- ChargePoint’s helpline is available for installation questions
Installation time for competent DIYer (NEMA 14-50): 15-20 minutes Installation time for competent DIYer (hardwired): 60-120 minutes
What makes it easier than competitors: The DIP switch amperage adjustment means you can set the charger to exactly the amperage your circuit supports without any app connection — useful for DIY installations where you want to confirm hardware function before configuring smart features.
JuiceBox 40 — DIY-Friendly With Good Support Resources
Price: $549 Why it’s DIY-friendly:
- NEMA 14-50 plug option available
- Comprehensive online installation guides from Enel X Way
- WiFi setup through the JuiceBox app is well-documented
- Good community support resources (Reddit, EV forums with experienced JuiceBox DIY installers)
What makes it slightly harder than Emporia: The JuiceBox app setup is slightly more involved than Emporia’s for initial WiFi configuration.
The Easiest Home EV Chargers to Install in Europe — For the Qualified Installer Path
Given that European DIY electrical installation is not legally appropriate in most markets, this section is framed differently: which European chargers have the most installer-friendly installation process — which means faster installation time, lower labour costs, and less complexity for the OZEV-registered or nationally certified electrician you’ll be hiring.
Understanding which chargers are installer-friendly helps you choose hardware that minimises installation cost — because the more complex the installation, the more you pay.
Easee One — Designed for Efficient Professional Installation
The Easee One is specifically designed around installer efficiency — its modular design separates the back plate (mounted first, containing all wiring connections) from the charger front unit (snapped on after wiring is complete). This two-part design means:
- The back plate can be mounted and wired before the charger electronics are attached — protecting the electronics during the installation process
- Wiring connections are clearly marked and accessible with the front unit removed
- The snap-on front unit makes commissioning clean and fast
- Easee’s installer app handles commissioning with minimal manual configuration
Typical professional installation time: 60-90 minutes — faster than most competing chargers
Why this matters for your costs: A 60-minute Easee installation versus a 120-minute Wallbox installation at £60-£80/hour electrician rates saves £60-£80 in labour costs.
Wallbox Pulsar Plus — Clear Installation With Good Installer Support
The Wallbox Pulsar Plus’s compact form factor makes physical installation simpler than larger charger units — less wall bracket complexity, lighter unit to handle alone. Wallbox’s installer portal and commissioning app are well-developed.
Typical professional installation time: 90-120 minutes
Myenergi Zappi — More Complex Installation, Worth It for Solar Owners
The Zappi’s installation is slightly more complex than the Easee or Wallbox because it requires connection to a current transformer (CT clamp) on your solar inverter or consumer unit to enable the solar monitoring that powers its divert capability. This CT clamp installation is straightforward for any experienced electrician but adds 20-30 minutes to a standard charger installation.
Typical professional installation time: 90-120 minutes plus CT clamp setup
The takeaway: Budget for slightly more installation time with the Zappi than with simpler chargers. The solar divert savings justify this — the CT clamp setup is a one-time cost, the solar savings are ongoing.
Hypervolt Home 3 Pro — Straightforward UK Installation
The Hypervolt Home 3 Pro’s UK-specific design includes clear wiring diagrams, good installer documentation, and Hypervolt’s installer support line for questions during installation.
Typical professional installation time: 90-120 minutes
The DIY Process — Step by Step for US NEMA 14-50 Plug-In Installation
This is the one installation scenario this guide covers step-by-step — because it’s the genuine no-permit, no-electrician, any-competent-adult scenario:
What You Need
- A NEMA 14-50 outlet already installed at your parking location
- Your chosen portable Level 2 EVSE with NEMA 14-50 plug
- A wall-mounting hook or bracket (usually included)
- A drill with appropriate bit for your wall material
- A voltage tester to verify the outlet is working correctly
- Approximately 20-30 minutes
Step 1: Verify the NEMA 14-50 Outlet
Before unpacking your EVSE, verify the outlet with a voltage tester or a simple outlet tester. A NEMA 14-50 outlet should show 240V between the two hot terminals and 120V between each hot terminal and the neutral. If it shows anything different — or if any indicator on a tester shows incorrectly — stop and call an electrician. A mis-wired 240V outlet can damage your charger and your car’s charging system.
Step 2: Mount the Cable Management Hook or Bracket
Most portable EVSEs include a simple hook or bracket for wall mounting. Decide where you want the cable to hang when not in use — typically beside the outlet — and mount the bracket using appropriate fixings for your wall type. In a wood-framed garage wall, a single 3-inch screw into a stud is adequate. In masonry, use a masonry anchor.
Step 3: Plug In the EVSE
Plug the NEMA 14-50 plug firmly into the outlet. Most portable EVSEs include an indicator light that shows when the unit is powered and ready.
Step 4: Configure Smart Features (If Applicable)
If you’ve chosen a smart EVSE like the Emporia Pro, download the manufacturer’s app and follow the WiFi setup instructions. This typically involves scanning a QR code on the unit and following prompts to connect to your home WiFi network.
Step 5: Test Charging
Plug the J1772 or NACS end of the cable into your car. The car should show charging initiated within 30-60 seconds. Confirm the charging rate in your car’s app or instrument cluster matches the expected rate for your charger and circuit.
That’s it. Total time: 20-30 minutes. No electrician, no permit, no special skills beyond basic tool competence.
The DIY Process — Hardwired US Installation (For Competent DIYers, With Permit)
For US owners who have an existing dedicated circuit and want to mount and wire a hardwired charger themselves:
What You Need
- A pulled permit from your local building department
- The charger manufacturer’s wiring diagram (in the installation manual)
- Appropriate wire — typically 6 AWG for 50A circuits, 8 AWG for 40A circuits
- Wire strippers, screwdrivers, voltage tester
- Mounting hardware appropriate for your wall type
- A helper is strongly recommended for the panel connection step
The Non-Negotiable Safety Rules
Rule 1: The breaker must be off before any wiring connections are made. This seems obvious. People skip it and die. Turn off the circuit breaker, verify with a voltage tester that the circuit is dead, then work.
Rule 2: Verify dead before touching. A voltage tester on the wires at the charger location — not just the assumption that you turned off the right breaker. Panels are sometimes mislabelled.
Rule 3: Do not work on the main panel yourself unless you are a qualified electrician. The panel connection — connecting to the bus bar and installing the breaker — involves components that remain live even when individual circuit breakers are off. The main lugs and bus bar are live whenever the main disconnect or utility supply is connected. This is where people get seriously hurt.
Rule 4: The inspection is not optional. A permit requires an inspection. The inspection is a safety check by a professional. Don’t skip it.
Step by Step
Step 1: Confirm the dedicated circuit is available and the correct amperage (40A or 50A breaker typically).
Step 2: Mount the charger unit on the wall using the manufacturer’s mounting template. Most chargers use four mounting screws on standard spacing.
Step 3: Route the cable from the panel location to the charger, through appropriate conduit if required by local code. This step may be the most labour-intensive depending on distance.
Step 4: Strip the wires to the manufacturer’s specified length — usually 3/4 inch.
Step 5: Connect L1 (typically black) to the L1 terminal, L2 (typically red) to the L2 terminal, and Ground (green or bare copper) to the Ground terminal. These are clearly marked on every charger covered in this guide.
Step 6: Close the charger enclosure and restore power at the breaker.
Step 7: Test charging before the inspection.
Step 8: Pass the inspection.
When to Absolutely Not DIY — The Honest List
This guide is about enabling informed decisions, which means being clear about when DIY isn’t appropriate:
Don’t DIY if you need a new circuit from the panel. Running wire from your electrical panel to the charger location — particularly making connections at the panel itself — involves live components that remain energised even with individual breakers off. The panel work is where electricians earn their fee.
Don’t DIY three-phase installation anywhere. Three-phase wiring involves three live conductors at 400V and requires fault protection equipment and installation techniques that are not appropriate for amateur installation.
Don’t DIY if you’re in the UK. Part P of the Building Regulations makes licensed installation mandatory. The OZEV grant requires an OZEV-registered installer. There’s no legal DIY path for EV charger installation in the UK beyond plug-in portable EVSEs.
Don’t DIY if you’re in any European country beyond plug-in scenarios. The legal frameworks in Germany, France, Netherlands, and other European markets require licensed electricians for new circuit work.
Don’t DIY if you’re not comfortable with 240V work. This isn’t false modesty — 240V can kill you if handled incorrectly. If you’ve never worked with 240V circuits, a Level 2 EV charger installation is not the right project to start with.
Don’t DIY if your panel is full, old, or unclear. An electrical panel with no available slots, visible corrosion, unclear labelling, or vintage fuse technology needs professional attention before adding an EV charger circuit.
Don’t DIY if your installation requires an outdoor weatherproof enclosure, trenching, or cable runs longer than 20 feet through walls. These scenarios add complexity that significantly increases the risk of errors.
The True Cost Comparison — DIY vs Professional Installation
One of the main motivations for DIY installation is cost savings. Here’s the honest math:
US DIY vs Professional
Plug-in EVSE (NEMA 14-50 existing outlet):
- DIY cost: $0 additional (you already have the outlet)
- Professional alternative: N/A (no professional needed anyway)
- DIY saving: $0 — this is DIY regardless
Hardwired charger, existing circuit, DIY:
- DIY cost: $0 labour
- Professional alternative: $150-$300 for electrician to make the final charger connections
- DIY saving: $150-$300
New 240V circuit from panel, DIY (where legal):
- DIY cost: $50-$150 in materials plus permit fees ($50-$200)
- Professional alternative: $200-$600 all-in
- DIY saving: $50-$350
- DIY additional risk: Potential permit failure requiring rework, potential safety inspection failure
The honest conclusion: The DIY savings on EV charger installation are real but modest — $150-$350 in most realistic scenarios. Weighed against the time investment (2-4 hours for a DIYer versus 1-2 hours for a professional), the permit process, and the risk of inspection failure requiring professional remediation, the financial case for DIY is less compelling than it appears.
The strongest case for DIY is the plug-in NEMA 14-50 scenario — where there’s no cost saving because no electrician was needed anyway, but significant convenience saving from not having to schedule and wait for installation.
UK and European Professional Installation Costs
In the UK, professional EV charger installation typically costs £150-£500 depending on the complexity of the cable run and any electrical panel work required. After the £350 OZEV grant for eligible flat owners, the net professional installation cost can be as low as zero.
In Europe, professional installation costs €150-€600 depending on country and complexity. National subsidy schemes in France (ADVENIR), Netherlands (SEEH), and Italy (Bonus Colonnine) cover significant portions of these costs.
The UK and European conclusion: Given that grants often cover installation costs, and given the legal requirement for professional installation in these markets, the DIY vs professional question in the UK and Europe is largely answered by the regulatory framework rather than the financial calculation.
Internal Links — Further Reading on Clean Energy Bazaar
The DIY EV charger installation 2026 US Europe guide covers the installation process. These guides cover what to install and what it costs.
For the full US home charger comparison including every model covered in this guide, our best home EV chargers 2026 US comparison covers ten options honestly. For the UK and European market, our best Level 2 EV chargers UK Europe 2026 guide covers every major option. For the portable vs hardwired decision that affects DIY feasibility significantly, our portable vs hardwired home EV chargers US Europe guide covers the real cost comparison and decision framework. For US state rebates that apply to both DIY and professional installations, our US EV charger rebates by state 2026 guide covers every major programme. For European grants and incentives, our EV home charging incentives Europe 2026 guide covers every country. And for understanding every spec mentioned in installation guides, our EV charger specs 2026 guide translates everything into plain language.
Final Thoughts
DIY EV charger installation 2026 US Europe is a genuinely accessible option for a specific set of scenarios — and genuinely inappropriate for others. The key is being honest about which scenario you’re actually in.
The genuine DIY scenarios:
- Plug-in NEMA 14-50 EVSE installation in the US (pre-existing outlet) — anyone can do this
- Hardwired charger on an existing dedicated US circuit (with permit) — competent DIYers with 240V comfort
- Plug-in CEE socket EVSE installation in Europe (pre-existing CEE socket) — anyone can do this
The not-DIY scenarios:
- Any new circuit work from the panel — get an electrician
- Any UK installation beyond plug-in — required by law
- Any European hardwired installation — required by law and professional best practice
- Three-phase work anywhere — no exceptions
The best DIY EV chargers for US 240V plug-in installation: Lectron 240V, Grizzl-E Duo, Emporia Pro (NEMA 14-50 version)
The best DIY-friendly hardwired chargers for US DIY installation: Grizzl-E Classic, Emporia Pro, ChargePoint Home Flex
The easiest professional-installation chargers for European markets: Easee One, Wallbox Pulsar Plus, Myenergi Zappi
Know your scenario. Know your legal requirements. Know your honest ability level. The right installation path is the one that leaves you with a safe, permitted, warranted charging setup — whether you did the work yourself or paid someone else to do it.